Kitchen details with pictures
Custom kitchen design using photos is the most practical way to make an informed decision before manufacturing begins.
Makaseb
August 17, 2026 at 4:03 pm AST
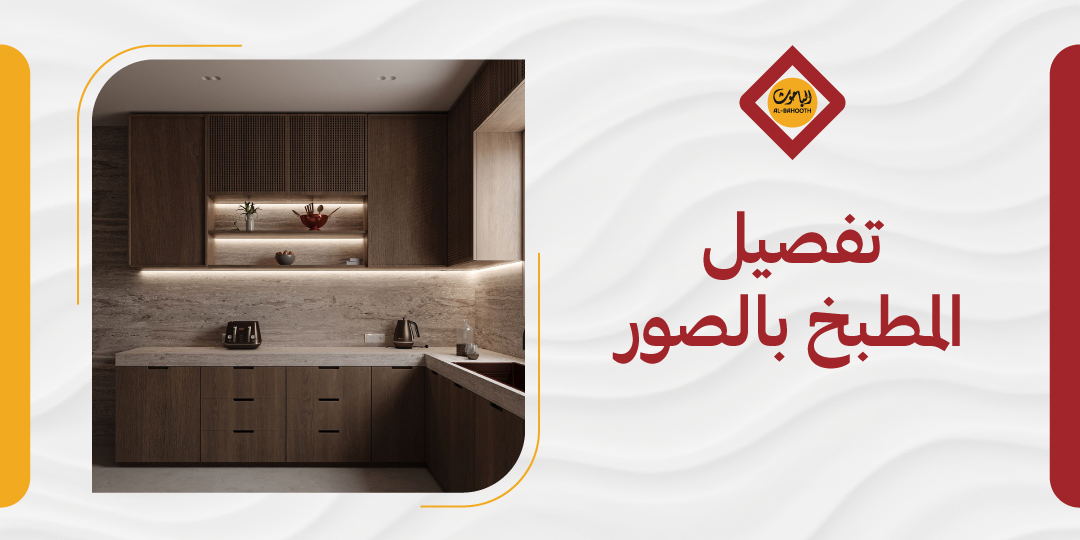
Custom kitchen design using photos is the most practical way to make an informed decision before manufacturing begins. It enables you to compare actual executed models, understand space distribution, and visually evaluate materials and finishes before your ideas transform into cabinets, countertops, and appliances in your home. However, a beautiful picture alone is not enough to make the right choice. Many photos do not clarify the nature of the material, how dead corners are utilized, the exact placement of built-in appliances, or what is actually included in the price quote.
This article serves as both a visual and practical guide, taking you step-by-step from reading photos of executed kitchens and finding design inspiration to preparing your request and choosing the right fabricator to execute a custom kitchen with precision and professionalism. If you are at the beginning of your journey and have a floor plan or even just photos of your space, Bahooth Factory welcomes your inquiries to provide an initial consultation and a detailed price quote based on your exact measurements and desired materials. Contact them now through the official Bahooth website to take a confident step toward your ideal kitchen.
How to Custom Design a Kitchen Using Photos
Custom kitchen design using photos goes beyond browsing beautiful inspiration images; it is a practical tool to help you make real decisions. Every photo should be read with an analytical eye: What is the shape of the space? How are the cabinets distributed? Where are the appliances placed? How was the lighting addressed? When a photo is evaluated this way, it transforms from mere visual inspiration into a applicable or discardable reference.
A fundamental point before proceeding: there is a significant difference between a photo of an actual executed project and a 3D rendering. Both are useful, provided they are clearly labeled. Presenting inspirational renderings as completed work misleads the reader and creates unrealistic expectations.
1. Small Space Models
Designing small kitchens using photos requires a careful reading of every visible detail. For every small kitchen image, it is best to attach notes explaining: the layout shape (I, L, or U), the type and finish of visible cabinets, the placement of the sink, stove, and refrigerator relative to one another, and how every available corner is utilized.
The most common solutions seen in successful small kitchen designs include:
- Vertical Utilization: Using upper cabinets that extend all the way to the ceiling to maximize storage capacity without taking up floor space.
- Internal Divided Drawers: Organizing small utensils and preventing clutter inside cabinet spaces.
- Tall Pantry/Appliance Columns: Integrating the refrigerator, pantry storage, and oven into a single seamless vertical cabinet.
Before duplicating any design from these photos onto your own space, check the corridor width between opposing kitchen units and ensure that cabinet doors and drawers can open freely without colliding.
2. Open Kitchen Designs
An open kitchen means the kitchen facade is a visible extension of the living or dining space, imposing a completely different visual equation. Photos here must reveal how cabinet fronts harmonize in color and material with the adjacent room's interior design.
When analyzing open kitchen photos, three vital questions must be addressed:
- Is there adequate ventilation around the cooking area? A powerful range hood is a functional necessity that photos rarely show.
- Does the island or breakfast bar allow comfortable walkway clearance on both sides? An island may look stunning in a photo, but reality might reveal cramped traffic flow.
- Does the front facade blend smoothly with the living room furniture, or does it create a visual clash?
Designing open kitchens through photos requires understanding the kitchen's relationship with its surroundings rather than viewing it as an isolated unit.
3. Modern vs. Classic Styles
Modern kitchen photos are characterized by clean horizontal lines, neutral or monochromatic palettes, handleless or continuous handles, and smooth finishes that reflect light softly. In contrast, classic kitchens rely on raised panel doors, warm or matte tones, and decorative details like carved moldings and cornices.
A visual comparison between the two styles should not lead to declaring one inherently better than the other. The choice depends on:
- The overall architectural style and design language of the house.
- Homeowners' preferences regarding daily maintenance, as decorative details demand more cleaning care.
- Available materials within the specified budget, since high-end classic designs require significantly more manual craftsmanship.
4. Corner and Storage Details
Utilizing corners in kitchen portfolios is one of the most interesting yet complex topics. A photo of a beautiful corner cabinet might hide operational challenges that deserve careful thought before adoption.
Common corner storage options include:
- 45-Degree Diagonal Corner Cabinets: A simple solution, though it sacrifices a portion of interior depth.
- Carousel Units (Lazy Susans): Mechanisms that simplify access but add mechanical complexity and cost.
- Corner Pull-Out Drawers: The most modern functional approach, requiring precise manufacturing and installation.
Annotated photos explaining these corner solutions provide a realistic expectation of daily accessibility and serve as a reminder that straight-line storage is generally less costly and easier to maintain long-term.
What is the Most Suitable Layout for Your Space?
Selecting a kitchen layout goes beyond choosing colors and finishes shown in custom kitchen photos. The real decision begins once actual site measurements are taken and the locations of doors, windows, and utility points are pinpointed. A successful design is built primarily on how well the layout accommodates room dimensions and daily traffic flow.
Choosing among the four core layout types depends on room shape, user count, and appliance choices—not just what looked attractive in a photograph. To understand the differences, it is essential to map out primary work zones: storage, washing, preparation, and cooking. Ordering these zones logically reduces unnecessary movement and makes kitchen work effortless.
A helpful planning tool is the Work Triangle concept linking the sink, cooktop, and refrigerator. It serves as a flexible guideline rather than a rigid rule, adaptable to family size, cooking habits, and actual appliance selections. Before approving any final drawing, verify clearance paths for opening refrigerator doors, ovens, dishwashers, and fully extended drawers so they never clash during daily use.
1. Single-Wall Layout (I-Shape)
This configuration arranges all kitchen units along a single wall, running work zones sequentially from storage to cooking in a straight line. It suits long, narrow spaces or open-plan apartments sharing space with living areas.
In a single-wall layout, a traditional work triangle does not exist; instead, workflow moves horizontally across three main points. Placing the sink centrally minimizes walking distance. Ensure drawer extensions and open appliances do not block traffic behind the user.
2. L-Shaped Layout
This layout spreads kitchen units across two perpendicular walls, creating a wider workspace and an intuitive, sequential workflow. It fits most right-angled rooms, whether closed or open-plan.
An L-shaped layout easily accommodates the work triangle between the sink, cooktop, and refrigerator across two walls. Care must be taken at the corner intersection to prevent it from becoming an awkward or wasted storage space.
3. U-Shaped Layout
Extending across three connected walls in a U-shape, this layout offers the maximum work surface and storage capacity compared to other configurations. It is ideal for independent kitchens with sufficient floor area and households where multiple people cook simultaneously.
A U-shaped kitchen keeps travel distances between storage, washing, prep, and cooking zones to a minimum. The most critical factor is measuring the internal corridor width; a narrow pathway hinders two people from passing each other and interferes with appliance door openings.
4. Kitchen Island Layout
An island is not merely an aesthetic accent; it is a functional component requiring careful spatial planning before inclusion. Typically added to L-shaped or U-shaped kitchens, it offers extra prep space or seating but requires generous clearance on all sides.
Before approving an island in the final layout, check these essential points:
- Maintain a walkway clearance of at least 90 cm (3 feet) on all sides for comfortable movement.
- Verify that the island does not obstruct opening doors for the refrigerator, oven, or dishwasher.
- Check door swing directions for facing cabinets to prevent collisions.
- Ensure the island does not interrupt the primary traffic path between kitchen work zones and room exits.
How Does Custom Fabrication Begin?
Using photos for custom kitchen design provides a clear mental picture of your goals, but transforming that vision into an executable plan requires a structured approach. Custom fabrication does not begin in the factory workshop; it starts by gathering accurate details upfront to avoid unexpected surprises during installation.
1. Preparing Client Requirements
Before site inspection, clients should prepare a set of basic details to accelerate the design process and ensure an accurate cost estimate:
- Clear photos of the space from multiple angles to illustrate layout and features.
- Rough room dimensions, if known.
- Locations of doors, windows, electrical outlets, and plumbing points.
- A list of desired appliances along with their model numbers or exact dimensions.
- Reference images reflecting preferred styles, colors, or layout ideas.
- An approximate project budget.
2. Site Inspection and Measurement
Once requirements are gathered, the custom kitchen execution follows a clear, step-by-step workflow:
- Performing an on-site inspection and taking precise field measurements.
- Drafting the initial layout plan and allocating functional work zones.
- Selecting core materials, finishes, and interior hardware.
- Reviewing a detailed 3D rendering or comprehensive technical drawing.
- Signing off on the final quotation and specifications.
- Transitioning to the manufacturing phase.
- On-site assembly and installation of units.
- Final inspection and sign-off verifying all details match specifications.
Measurement errors or ignored appliance dimensions lead to uneven gaps, door collision issues, or ill-fitting appliance cutouts. Fabrication or installation should never commence without written sign-off on measurements and drawings.
3. Approving the 3D Layout
Reviewing the 3D design model is not a mere formality; it is the final opportunity to catch errors before production begins. When reviewing the kitchen rendering, verify the following details:
- Heights of upper and lower cabinets.
- Exact placement of all built-in appliances.
- Required ventilation cutouts for each appliance.
- Door and drawer swing directions to prevent conflicts.
- Front door colors and visual harmony with the surrounding space.
- Countertop materials, edges, and seam placements.
- Task lighting placement and distribution over prep areas.
4. Manufacturing, Installation, and Inspection
Following design approval, actual manufacturing begins based on verified dimensions, followed by on-site installation and a thorough final handover inspection.
If you are ready to start your custom kitchen project and turn ideas into reality, Bahooth Factory can guide you through every stage. Share your space requirements, request a layout or quotation, and rest assured that all final specifications will be reviewed and agreed upon in writing before manufacturing begins.
How to Select Materials and Finishes?
Attractive kitchen photos often mask fundamental material details that dictate durability over years of use. Cabinets that appear sturdy in a photo can vary drastically in core panel composition, edge-banding quality, hardware grade, and drawer runners. Therefore, when designing a custom kitchen from photos, do not rely on visual appearance alone; demand detailed written specifications for every component rather than relying on brand names.
1. Practical Aluminum Fronts
Aluminum kitchen fronts are popular in high-humidity and high-temperature environments. However, material selection alone does not guarantee performance; real quality depends on precise specs.
When discussing aluminum cabinet fronts with a fabricator, inquire about:
- Profile type and thickness, which directly affect structural rigidity and weight capacity.
- Surface finish and edge treatments, as raw or unsealed edges become weak points over time.
- Quality and mechanism of included hinges; inferior hinges degrade door performance regardless of front quality.
- Ease of cleaning and material suitability for steam and heat levels in your specific kitchen setup.
No single material fits every scenario; matching specs to your actual usage environment is key.
2. Wood Alternatives and Engineered Boards
Natural wood, MDF, and particleboard cabinets vary widely in density and quality grade, often labeled vaguely as "luxury" or "practical" without specification details.
Key factors to verify include:
- Core board type and density, which determine load capacity and resistance to sagging.
- Edge-banding methods (such as ABS, acrylic, or PUR hot-melt banding), as exposed edges are prime spots for moisture absorption.
- Moisture-protection measures applied during cabinet assembly, not just within the board itself.
- Installation precision and alignment between cabinet modules.
- Expected usage patterns; a heavy-use family kitchen requires higher specifications than a light-use kitchenette.
Photos help visualize appearance, but exact material specifications define actual lifespan.
3. Suitable Worktops/Countertops
Countertops bear the highest daily wear and tear in the kitchen, yet they are frequently chosen solely for aesthetic appeal. Selecting the right surface requires balancing several practical performance factors simultaneously:
- Daily Wear Resistance: Resistance to scratching, heat, and impacts varies significantly across natural granite, quartz, porcelain, solid surface, and laminate.
- Ease of Cleaning and Hygiene: Non-porous surfaces with minimal seamless joins require far less maintenance than porous or heavily jointed countertops.
- Sink and Cooktop Integration: Mounting options (undermount, flush-mount, top-mount) affect daily usability and cleaning ease.
- Edge Profiles and Seams: Edge treatments and joint quality impact both safety and overall aesthetics.
- Maintenance Requirements: Some natural stones require periodic sealing, whereas engineered quartz or porcelain do not.
Avoid relying on absolute performance claims without written spec sheets supporting them.
4. Essential Internal Accessories
In custom kitchen image galleries, cabinet fronts and countertops receive primary attention, while internal fittings are easily overlooked—despite their major impact on daily convenience and project cost.
- Door Hinges: Soft-close, high-grade hinges protect cabinet frames and ensure smooth door alignment over time.
- Drawer Runners: Full-extension, soft-close heavy-duty runners are essential functional standards that reflect build quality.
- Storage Organizers: Custom cutlery trays, spice pull-outs, and internal dividers maximize cabinet volume.
- Corner Mechanisms: Magic corners, pull-out kidney trays, or carousels turn awkward dead corners into efficient storage space.
- Integrated Trash Pull-outs: Concealed multi-bin systems keep waste out of sight and maintain hygiene.
All internal fittings should be clearly itemized in project specifications, as adding or upgrading them later incurs higher costs than including them from the start.
What Drives Up the Cost?
The price of a custom kitchen cannot be determined from a photo or approximate room area; it depends on cabinet specifications, component choices, and installation scope combined. Every decision made during design—from door style and countertop material to drawer count—directly impacts the final cost. Understanding kitchen pricing requires examining the primary factors driving figures up.
1. Linear Meter Measurement
Many fabricators quote prices based on the linear meter for upper and lower cabinets. While useful as an initial baseline, comparing linear meter rates between quotes without knowing what each includes can be misleading.
Some quotes bundle installation costs into the linear meter rate, while others bill it separately. Certain suppliers calculate corners as standard linear meters, while others charge structural premiums for corner modules. Before comparing linear meter prices, ensure included scope and specifications match across quotes.
2. Impact of Corners and Drawers
Photos showcase designs visually, but structural details shape true cabinet costs. Primary factors driving prices up include:
- Complex Room Angles and Cutouts: Non-standard angles require extra raw materials, custom cutting, and labor.
- Drawers and Pull-out Hardware: Moving mechanisms (soft-close runners, cargo pull-outs, internal drawers) are priced per unit above base cabinet pricing.
- Full-Height Pantry Columns: Floor-to-ceiling appliance and pantry towers cost significantly more than standard base/wall units.
- Front Finishes: Premium finishes (lacquer, natural veneer, acrylic, thermofoil) alter overall pricing substantially compared to standard laminate/melamine.
- Internal Organizers: Specialized storage accessories, pull-out baskets, and tray dividers add to the base unit cost.
3. Role of Appliances and Countertops
Countertop selection alone can alter project budgets completely. Natural granite, quartz, porcelain, solid surface, and compact laminate vary widely in raw material costs and fabrication complexity.
Kitchen pricing categories (economy, mid-range, premium) reflect written specifications for cabinet carcasses, fronts, hardware, countertops, and services included in the contract. Comparing quotes without auditing spec sheets leads to inaccurate comparisons.
Built-in appliance cutouts (ovens, microwaves, dishwashers) require structural reinforcement and custom cabinet frames, often listed as individual items on price breakdowns. Delivery, installation, and site adjustments complete the total budget picture.
4. Reviewing the Price Quote
Before accepting any custom kitchen quote, ensure the following line items are explicitly detailed in writing:
- Approved dimensions for upper and lower units.
- Total cabinet unit count and structural specifications for each module.
- Cabinet carcass material, core density, and front finish type.
- Countertop brand, material type, thickness, and edge profile.
- Hinge and drawer runner brands, models, and load ratings.
- Included built-in appliances or precise cutout framing specifications.
- Additional site works, cutouts, plumbing/electrical modifications, or panel fillers.
- Delivery and installation fees (stating whether included or billed separately).
- Payment terms, payment schedule, and fabrication timeline.
- Warranty terms, coverage scope, and post-installation service agreements.
Focus on finding the most transparent, detailed quotation rather than simply the lowest overall number. Bahooth Factory provides fully itemized cost estimates covering these parameters, empowering you to make clear, well-informed decisions when planning a custom kitchen using photos.
Frequently Asked Questions About Custom Kitchen Design Using Photos
Note: The answers below help prepare you for an informed decision, but final designs and accurate pricing always require on-site measurements, exact material selections, and appliance specifications.
1. How do I design my kitchen myself?
Start by measuring all room walls, doors, windows, and utility points accurately, then select your intended appliances and their placements. Next, sketch an initial layout organizing storage, washing, prep, and cooking zones, and gather reference photos matching your preferred aesthetic. Finally, review your sketch with a professional fabricator before manufacturing, as measurement errors are difficult and costly to rectify once production begins.
2. How much does custom kitchen fabrication cost per meter?
A custom kitchen cannot be assigned a fixed cost per meter, as pricing depends on measurement methods and included contract items—such as carcass materials, front finishes, countertop types, drawer counts, corner hardware, and installation fees. To get an accurate figure, request an itemized quotation from Bahooth Factory and compare it against quotes offering identical specifications.
3. What is the best kitchen shape?
There is no single "best" layout for every home; the ideal shape depends on room dimensions, natural traffic paths, utility locations, and appliance selections. Narrow kitchens benefit from single-wall or galley layouts, whereas larger spaces accommodate L-shaped, U-shaped, or island layouts—provided required walkway clearances are preserved.
4. What is the best kitchen design software?
The best kitchen design software is any tool that allows you to input precise room dimensions and appliance sizes to generate an accurate 3D spatial layout. However, computer software and digital photos remain planning aids; they cannot replace professional on-site field measurements and expert review prior to manufacturing.
Conclusion
Designing a custom kitchen using photos is not merely a decorative step; it is an effective approach to transform abstract ideas into a custom-built kitchen tailored to your home and daily lifestyle. By combining clear reference photos, approved technical drawings, and precise material specifications, the entire process shifts from guesswork to an informed, confident decision.
The ideal practical roadmap begins by selecting reference images matching your actual room proportions, settling on a layout before picking colors, and carefully auditing materials, hardware, and written contracts. When evaluating quotes, rely on itemized material specifications rather than total cost alone, as the true value of custom cabinetry lies in structural quality and hardware grade rather than surface appearance.
Are you ready to start designing a custom kitchen tailored precisely to your space? Contact Bahooth Factory today, share your room layout or photos, and receive a professional consultation and custom quote with every detail clearly specified in writing before fabrication begins. Every journey starts with a vision, and every custom kitchen deserves a solid foundation.