Old Wooden Kitchen Renovation: Ideas, Steps, and Smart Solutions
Discover practical ideas to renovate your old wooden kitchen. Compare painting, refacing, and repairs, and upgrade your space with Bahooth Factory.
Makaseb
September 3, 2026 at 2:40 pm AST
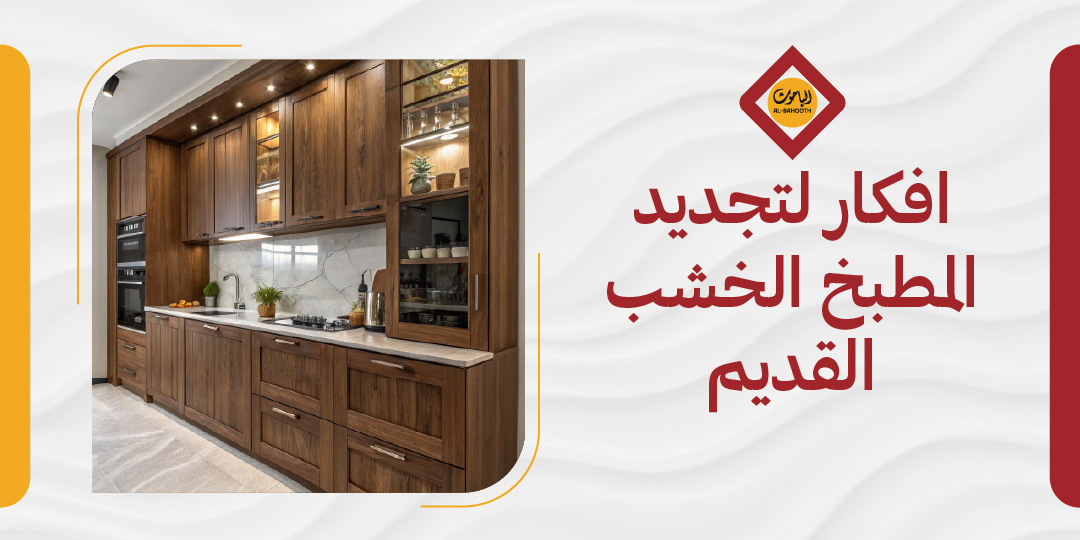
Your wooden kitchen may no longer look the way it used to—the color has faded, scratches have become visible on the surfaces, and moisture has left its marks in certain corners, compounding the frustration of limited storage that no longer accommodates your daily needs. When you consider a complete replacement, the decision often collides with high costs that may not be budgeted. This is where old wooden kitchen renovation ideas emerge as a truly practical solution. Noticeable visual and functional transformations can be achieved through gradual, well-planned interventions—ranging from repainting, wrapping, or cabinet refacing to enhancing storage and lighting—all at a far more manageable cost than building a brand-new kitchen from scratch.
This guide from Bahooth Factory walks you through a clear, step-by-step process for reviving your wooden kitchen: starting with assessing the wood's condition and diagnosing underlying issues, choosing the right level of renovation, properly preparing surfaces, and upgrading both aesthetics and functionality. It also highlights cases where DIY home repairs are insufficient and require professional intervention. If you are currently evaluating your options and unsure where to begin, you can contact Bahooth Factory for an accurate assessment of your kitchen's condition and customized solutions tailored to your needs. Successful renovation always begins with a proper diagnosis before any decision is made.
Diagnosing the Condition of Your Wooden Kitchen
Before exploring design ideas to renovate an old wooden kitchen, you must understand the actual condition of your cabinetry. The success of any renovation depends primarily on the structural integrity of the wooden framework, rather than the visual appeal of an idea or layout. Fresh paint or sleek wrapping will not conceal a structural flaw; instead, the issue will resurface shortly. Addressing the root cause prior to applying any finish is what guarantees long-lasting results.
1. When Is Wood Suitable for Renovation?
Cabinets suitable for renovation share core characteristics: they must be structurally stable, completely dry, and reasonably clean. When these conditions are met, many common defects discovered during an inspection can be resolved with minimal effort.
Defects that can be repaired as DIY projects include:
- Surface scratches and minor gouges can be treated with appropriate wood filler prior to painting.
- Weakened or loose hinges can be resolved by replacing the hinge or re-anchoring it without dismantling the entire cabinet box.
- Drawers that stick or slide with difficulty can be repaired by realigning their tracks or replacing their rollers.
- Small gaps between door panels can be filled with flexible sealant before finishing.
Conversely, if the wood suffers from structural decay in its load-bearing framework, or if the interior panels have lost their rigidity, the damage exceeds simple DIY repair and demands professional intervention.
2. Treating Moisture Damage and Swelling
Treating wood swelling and moisture damage starts not with surface cosmetic repairs, but by identifying the root problem. Follow these steps in sequence:
- Identify Warning Signs: Look for swollen door edges, warped cabinet bases, abnormal dark discoloration, visible water leak marks, or a persistent musty odor when opening doors. These indicators confirm active moisture rather than old, dried damage.
- Halt Cosmetic Finishes: Never apply paint, vinyl wrap, or adhesive film over a damp surface. The moisture will prevent adhesion, causing peeling and worsening the underlying rot.
- Locate the Leak Source: Determine if moisture originates from a faulty faucet, drainage connections, or insufficient ventilation that allows humidity to accumulate inside the cabinets.
- Fix the Leak and Dry Thoroughly: Resolve the plumbing leak or improve ventilation prior to any further work. If widespread mold or hidden structural decay is present, consult a specialist. Allow the wood ample time to dry completely until it regains its structural dryness before applying finishes.
Maintaining proper ventilation inside the kitchen and avoiding finishing over damp wood reduces the risk of weak paint adhesion and future peeling.
3. Essential Maintenance Inspection Checklist
A structured inspection sequence for kitchen cabinet maintenance begins at high-risk zones and ends with easily overlooked details:
- Inspect directly beneath the sink, as this area is most exposed to plumbing leaks and chronic moisture accumulation.
- Check the overall structural stability of the wall-mounted cabinets by manual movement; loose cabinets must be re-anchored before proceeding with repairs.
- Test the operation of hinges and slides on every door and drawer, ensuring they close evenly without alignment sagging.
- Inspect countertops for cracks or swollen sections where liquids could seep into the underlying wood framework.
- Examine areas exposed to heat and steam, such as the immediate perimeter of the cooktop and kettle placement zones, which accelerate paint degradation and weaken wood fibers.
Never cover up detected damage with paint or adhesive wrap prior to fixing it. This essential step separates genuine, long-lasting renovation from temporary cosmetic fixes.
Determining the Right Level of Renovation
Not every old kitchen requires complete replacement or a massive budget. Evaluating the true condition of your cabinet boxes and framing saves both time and financial resources. Available options fall into three categories: minor cosmetic updates, partial refacing, and complete replacement.
1. Minor Cosmetic Touch-Ups
When cabinet boxes are structurally sound and free of rot or deep damage, simple interventions can completely transform the kitchen's appearance. This approach is ideal for kitchens with faded finishes, outdated handles, or insufficient lighting.
2. Cabinet Refacing (Replacing Doors and Drawer Fronts)
Updating cabinet doors while retaining the internal structural boxes is a smart solution when the interior frames remain sturdy, but the door fronts show wear or outdated styling that paint alone cannot conceal.
Under this approach, cabinet doors can be fully replaced with modern designs while keeping the existing cabinet boxes intact. Additional enhancements in this category include:
- Replacing select solid doors with glass-front inserts to add visual lightness and break up monotony.
- Adding open shelving in designated units to create a sense of spaciousness, provided these areas are positioned away from direct cooking grease and heavy steam.
- Ensuring that structural modifications do not compromise the overall storage capacity of the kitchen.
3. When Full Replacement Is Necessary
In certain cases, partial renovation is ineffective, and repeated repair costs quickly surpass the investment required for a full replacement. Full replacement is recommended under the following conditions:
- Widespread moisture damage that has compromised the structural integrity of the interior cabinet frames.
- Unstable or cracked cabinet framing that makes secure wall mounting unsafe.
- Severely damaged drawers and tracking mechanisms where repair is no longer cost-effective.
- An outdated layout that severely hinders workflow, traffic movement, or functional storage.
The key decision metric is comparing the expected cost of repair against the longevity of the result: if a lower-cost temporary fix will need to be redone within a year, professional customization or full replacement represents the more logical long-term investment.
Surface Preparation Before Painting
Many homeowners skip directly to selecting paint colors, but subsequent issues like peeling, flaking, or uneven color distribution almost always stem from inadequate surface preparation. Preparation is more critical than color selection itself—even the highest-grade paint will fail to adhere to a greasy, damp, or un-sanded surface. Proper preparation turns renovation ideas into durable, long-lasting finishes.
1. Disassembly and Labeling
Before beginning, detach all moving components from the fixed cabinet frames using the following sequence:
- Open each door individually and place a small piece of painter's tape (or mark with a pen) on an inconspicuous area, writing its exact location (e.g., "Door 1 - Upper Left" or "Drawer 2 - Center").
- Remove hinges and hardware, placing them in labeled bags corresponding to their specific door or drawer.
- Remove drawers completely, documenting their top-to-bottom sequence.
- Protect flooring, countertops, appliances, and adjacent surfaces with heavy kraft paper or plastic drop cloths prior to work to guard against paint splatter and sanding dust.
2. Deep Degreasing
Degreasing kitchen cabinets is an unskippable step. Accumulated oils, airborne grease, and cooking residues form a barrier that prevents primer and paint from bonding to the wood.
- Use a dedicated wood-safe degreaser or mild cleaning solution, scrubbing gently in circular motions.
- Treat any traces of surface mildew or mold with specialized treatments before proceeding.
- Wipe the surface thoroughly with a clean, water-dampened cloth to eliminate cleaner residue.
- Allow the surface to dry completely in a well-ventilated area. Painting over a damp or dirty surface compromises adhesion and leads to flaking.
3. Repairing Scratches and Gouges
Old wood often features surface scratches and small indentations that become glaringly obvious after painting if left unaddressed.
- Clean the damaged area thoroughly to ensure filler adhesion.
- Apply wood filler into the scratch or gouge using a putty knife, pressing it firmly and smoothing it level with the surrounding wood.
- Allow the filler to cure completely according to the manufacturer's instructions.
- Once fully dry, sand the filled area flat using fine sandpaper until it blends seamlessly with the adjacent wood profile.
4. Proper Sanding Techniques
Sanding removes old glossy coats and opens the wood grain, allowing wood primer and paint to bond securely. Follow these steps:
- Select sandpaper in the 150- to 220-grit range, which is standard for pre-paint preparation (always cross-reference with your specific paint system guidelines).
- Sand strictly in the direction of the wood grain to avoid cross-grain scratch marks.
- Apply light, uniform pressure across the entire surface rather than concentrating on a single spot.
- After sanding, thoroughly remove all airborne dust using a dry microfiber cloth or soft brush.
- Do not apply primer or the first coat of paint until the surface is completely dust-free.
Preparing a clean, dry, and scuffed (de-glossed) surface prior to painting is essential for optimal finish adhesion and durability. Always wear protective gear—such as gloves and dust masks—ensure adequate workspace ventilation, and strictly follow product application guidelines.
Selecting Cabinet Finishes and Materials
When evaluating options for updating an old wooden kitchen, homeowners face choices between painting, vinyl wrapping, and cabinet refacing. The right selection depends on current surface conditions, daily usage intensity, kitchen humidity levels, and aesthetic goals.
1. Choosing Cabinet Paint
Not all paints are suitable for kitchen cabinetry. There is a fundamental functional difference between standard decorative wall paint and high-durability surface coatings. Wall paint is formulated for low-contact vertical surfaces, whereas kitchen cabinets are opened, closed, and exposed to steam, moisture, and handling daily. Choose coatings specifically formulated for cabinetry or heavy-use surfaces.
Follow manufacturer application protocols carefully:
- Apply an appropriate wood primer tailored to the substrate before painting to enhance adhesion and extend finish life.
- Respect recommended dry times between successive coats without rushing the process.
- Apply protective topcoats as recommended on product specification labels.
Water-borne alkyd or specialized acrylic enamel paints facilitate easy cleaning later, but they require good ventilation during application and controlled humidity. Never assume paint provides absolute waterproofing; consult product technical sheets to verify suitability for kitchen environments.
2. Vinyl Wrapping and Adhesive Films
Wrapping wooden kitchen cabinets with waterproof architectural film or heavy-duty vinyl is a fast way to alter appearance. However, it requires specific surface conditions:
- Suitable only for smooth, structurally sound door faces free of swelling, deep texture, or rot.
- Demands a completely clean, dry, and dust-free surface prior to application.
Practical limitations of adhesive wrapping include:
- Edges and areas directly exposed to steam, stovetop heat, or high humidity are prone to peeling over time.
- Continuous moisture exposure combined with improper edge sealing accelerates adhesive failure.
- Wrapping over damaged or uneven surfaces highlights flaws beneath the thin film rather than hiding them.
- Adhesive film should not be used as a substitute for structural repair on compromised cabinets.
3. Color Selection for Kitchen Spaces
Selecting paint colors for small kitchens follows different principles than designing spacious layouts. The primary rule governs the balance between color, light reflection, and perceived visual volume.
Light, neutral tones—such as warm whites, soft grays, and light beiges—reflect natural light, making compact kitchens feel larger. Darker shades can be used strategically: applying a dark tone exclusively to lower base cabinets or a single accent wall creates visual depth without overwhelming the space.
To achieve a balanced design, coordinate cabinet colors with three key elements:
- Flooring: Harmonizing cabinet tones with floor materials establishes visual continuity.
- Countertops: Countertops represent a primary horizontal visual plane in the kitchen.
- Natural Light Levels: Kitchens receiving abundant sunlight can accommodate deeper color palettes than darker, enclosed spaces.
4. Protecting the Finished Surface
Applying a quality finish is only half the process; preserving it requires proper curing and care:
- Allow paint to fully cure according to the manufacturer's specified cure timeline before reassembling hardware or subjecting cabinets to daily use.
- Reinstall doors and drawers gently, avoiding impacts during the initial curing phase.
- Clean finished cabinets using non-abrasive cloths and mild, solvent-free cleaners.
- Avoid heavy daily wear until full chemical cure is achieved, as premature use compromises surface hardness and stain resistance.
Upgrading Hardware and Accessories
Replacing visible details and functional hardware delivers high impact without altering the core structural footprint. This approach resolves daily operational issues—such as sticking drawers or misaligned doors—while modernizing overall appearance at a reasonable cost.
1. Replacing Handles, Hinges, and Slides
Upgrading cabinet handles is one of the fastest ways to update kitchen style. Precise measurements ensure seamless installation:
- Measure the exact distance between the center of the two screw holes on existing handles (known as "center-to-center" distance) to avoid drilling new holes or leaving exposed patches.
- Inspect the condition of existing door hinges. Worn or sagging hinges cause misaligned cabinet doors even with new handles installed.
- Check drawer slide mechanisms; replacing old metal or wooden tracks with soft-close ball-bearing slides improves daily functionality.
- Select hardware finishes aligned with your design theme: brushed nickel complements modern styles, matte black adds contrast, and warm brass offers classic elegance.
- Install new hardware using the provided screws, ensuring vertical and horizontal alignment with a measuring tape or installation template before final tightening.
2. Updating Cabinet Doors
Several approaches exist for updating old cabinet doors, depending on budget and existing conditions:
- Repainting Existing Doors: The most cost-effective approach for structurally sound doors requiring only color updates or light scratch concealment.
- Replacing Door Fronts Only: Replacing external door and drawer fronts while retaining interior cabinet boxes saves time and labor while delivering a brand-new appearance.
- Installing Glass-Insert Doors: Replacing select solid upper doors with glass inserts adds visual depth and breaks up heavy runs of cabinetry.
- Creating Open Shelving: Removing doors from select upper units creates open display shelving. This requires neat storage habits and regular dusting, making it less suitable for high-grease cooking zones.
3. Countertop Upgrades
Countertops significantly influence both kitchen functionality and visual style. Natural marble is not the only option; materials like engineered quartz, granite, solid surface acrylics, or high-pressure laminates offer varying degrees of heat, stain, and scratch resistance based on usage patterns.
4. Modern Finishing Touches
Small complementary additions complete a renovation and unify kitchen design elements:
- Drawer dividers and pull-out spice organizers improve internal cabinet order.
- Color-coordinated kitchen linens match cabinetry or accent tones for visual harmony.
- Minimalist window treatments soften incoming light without cluttering workspace.
- Modular interior organizers maximize vertical storage capacity and reduce countertop clutter.
- Low-maintenance plants placed away from direct cooking steam add warmth and vitality.
Frequently Asked Questions
1. What are the main methods for renovating a wooden kitchen? Kitchen renovation methods range from basic cosmetic updates to comprehensive overhauls. The right choice depends on cabinet structural health:
- Deep cleaning and repairing damaged sections prior to applying finishes.
- Painting cabinet boxes and doors to update color at a controlled cost.
- Applying architectural vinyl wraps to smooth, undamaged door faces.
- Refacing cabinet doors while retaining internal box framing.
- Replacing hardware (handles, hinges, and drawer slides) to enhance operation and style.
- Upgrading or overlaying countertops to improve durability and appearance.
- Installing task lighting under upper cabinets to enhance visibility and depth.
- Reorganizing interior shelving and adding modular storage inserts.
2. What kitchen elements can be renovated or updated? Most kitchen components can be refreshed or upgraded without full replacement, provided moisture issues are resolved first:
- Cabinet boxes and door fronts (paintable, wrappable, or replaceable).
- Hardware, including handles, knobs, hinges, and drawer slides.
- Drawers (adding internal dividers or realigning tracking mechanisms).
- Countertops (repairing, resurfacing, or replacing).
- Cabinet and task lighting fixtures.
- Backsplashes (applying tile paint or self-adhesive backsplashes).
- Internal storage accessories (baskets, pull-out racks, and organizers).
3. What are some effective ideas for organizing kitchen cabinets? Organizing cabinet interiors improves daily efficiency and maximizes available storage space:
- Group items logically by category (e.g., spices, cookware, dry goods, dishware).
- Utilize interior drawer dividers and stackable baskets to segment deep spaces.
- Store daily essentials at waist-to-eye level while reserving high or low shelves for rarely used items.
- Keep cleaning chemicals entirely separate from food storage zones for safety.
- Maximize vertical shelf height using freestanding shelf risers or pull-out organizers.
4. What DIY ideas can I implement to refresh my kitchen? Practical DIY updates include:
- Performing a deep, thorough degreasing of all cabinet surfaces.
- Reorganizing internal shelf layouts based on usage frequency.
- Replacing old cabinet handles with modern hardware using existing screw holes.
- Painting cabinets after cleaning, repairing gouges, and proper sanding.
- Installing peel-and-stick shelf liners inside drawers and cabinets.
- Adding modular, non-permanent organizers inside drawers and deep cabinets.
Summary and Next Steps
Renovating an old wooden kitchen involves a series of logical steps that begin with structural inspection and end with finishing details. Decisions based on an accurate assessment of current conditions deliver durable, cost-effective long-term results.
The recommended sequence starts with inspecting wood integrity, resolving moisture sources, and executing structural repairs. Next, select the appropriate renovation strategy—whether painting, vinyl wrapping, or cabinet refacing—based on cabinet condition. Finally, complete the update by upgrading hardware, storage organizers, and task lighting to balance form and function.
Successful kitchen updates prioritize long-term utility over short-term trends. Address underlying structural issues rather than covering damage with fresh paint or film.
Ready to take the next step? Document cabinet defects with photos, measure your space, and define your primary goals (durability, budget, speed, or aesthetics). Contact Bahooth Factory for expert guidance, professional material inspections, or custom cabinet refacing and fabrication tailored to your space and budget. Visit Bahooth Factory today to schedule your consultation.